Airtable Internal Collections
Airtable can be used as a collection for generating Dynamic Pages. For more information on collections, see Define a Collection for Dynamic Pages.
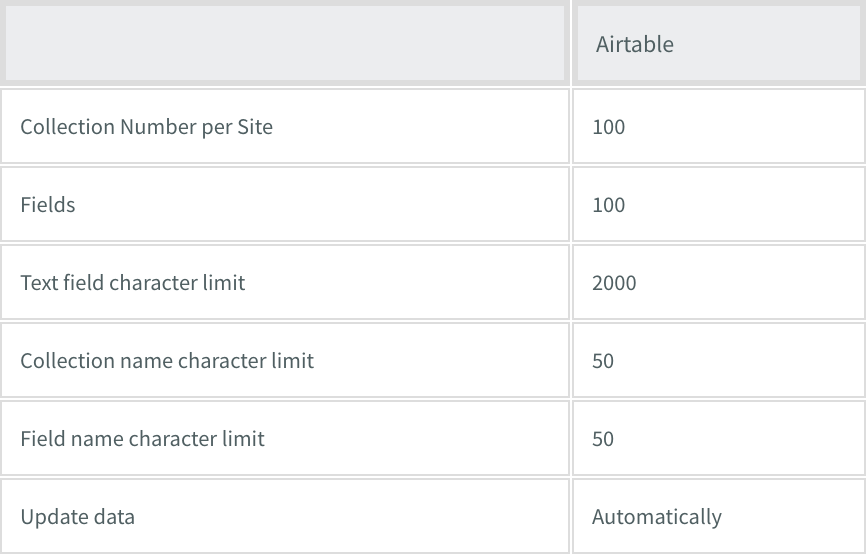
Airtable collections have the following limitations:
To create an Airtable collection:
- In the left panel, click Content, click Collections, and then click + New Collection.
- Click Airtable.
- Enter your Airtable API credentials.
- In Airtable, select the table you want to use as your collection. This takes you to the Airtable API documentation.
- Under Authentication, copy the example link.
- Return to Website Builder and paste it in the field under your API credentials.
- Click Import Fields.
- Define the correct data type for each field.
- Click Continue.
Supported Fields
The following table outlines the supported Airtable fields, the corresponding Website Builder fields, and examples.

Note
Due to API limitations, Website Builder will not import fields that do not have content in the first 10 rows.
Row Order
When using Airtable collections, the row order is being pulled in randomly due to an API limitation on Airtable's site. We ignore filters or sorting in Airtable.
To pull the row order in the same order that exists in Airtable, including filters and sorting, add the Airtable View name to the example URL that you are using to import their collection. For more information, see Airtable Support.
To add the view, after the example URL is added, add '?view=View Name' . The view name is case sensitive and should be typed exactly how it's written in Airtable.
Warning
Deleting or changing the view name after importing the collection will break the connection.
The following is an example of the URL before adding the view name:
https://api.airtable.com/v0/appbiL1pCyvFcW8WG/Feedback%20Session
The following is an example of the URL after adding the view name:
https://api.airtable.com/v0/appbiL1pCyvFcW8WG/Feedback%20Session?view=Main View
For more information on adding the view name to the URL, see this video.
The next step is to create or convert a Dynamic Page so you can connect it to your newly created collection.
Updated on: 01/27/2025
Thank you!