Support Articles
Stay Connected
Sell on Instagram

You can sell products from your StoreFront by tagging them on your Instagram posts. When you showcase your products on Instagram, customers can tap on your products to check the item's pricing and details. Tagging Instagram posts with your products also provides a direct link for customers to purchase the product in your online store.
Note
Your business must comply with Instagram's requirements to access this feature.
Shopping on Instagram
Shopping on Instagram provides access to Instagram’s platform through Facebook. With this feature, you can tag photos on
Instagram with products from your Facebook shop catalog and provide more information when your customer taps on the tag. This feature helps you share product details, pricing, and a direct link to your store where customers can complete their purchase.
Instagram is currently testing Shopping in Store, and will gradually roll out Shopping in Stores to businesses in supported countries that follow these requirements.
Tapping the product tag from your post provides the following information:
- The product’s image from your site.
- The product’s description.
- The product’s price.
- A link to purchase the product on your site.
You can tag posts with up to 5 products per image or 20 products per carousel.
After publishing 9 shopping posts, businesses receive a persistent Shop tab on their Instagram business profile. This allows customers to easily view all posts with tags from your account.
Access Shopping on Instagram
Instagram establishes a few parameters to sell on Instagram with Shoppable Posts:
- Your business must be located in one of these 44 countries.
- Your business must follow Instagram’s merchant agreement.
- Your Instagram account must be a business profile (free to set up).
- Your business must primarily sell physical goods that comply with Facebook's commerce policies.
- Your Instagram app must be the latest version.
- Your business profile must connect to a Facebook catalog.
To successfully connect your StoreFront to Instagram:
- Add your store to Facebook.
- Make your Instagram account a business profile.
- Connect Instagram to your Facebook page.
Once complete, Instagram will review your account before granting access to the feature.
Step 1. Add your products to the Facebook Shop
If your physical products comply with Facebook Commerce Policies, and you already have a Facebook business page, uploading your products is easy.
Step 2. Connect your Facebook catalog with your Instagram profile
Go to the Store Control Panel, click All Sales Channels, and then click Sell on Instagram.
Next, you’ll need to link your Instagram account with your Facebook profile. While in your Instagram account, you will also be able to update your account to a business profile.
Once complete, Instagram will review your account. According to Instagram, processing time varies from a few hours to a few weeks.
Note
You may not access the Shoppable Posts feature until Instagram verifies your account.
When you return to the Sell on Instagram page in the Store Control Panel, you maybe notice the button still says Connect to Instagram. This does not mean that you have incorrectly connected your Facebook profile and Instagram account. The Connect to Instagram button may remain in your Store Control Panel. However, ensure:
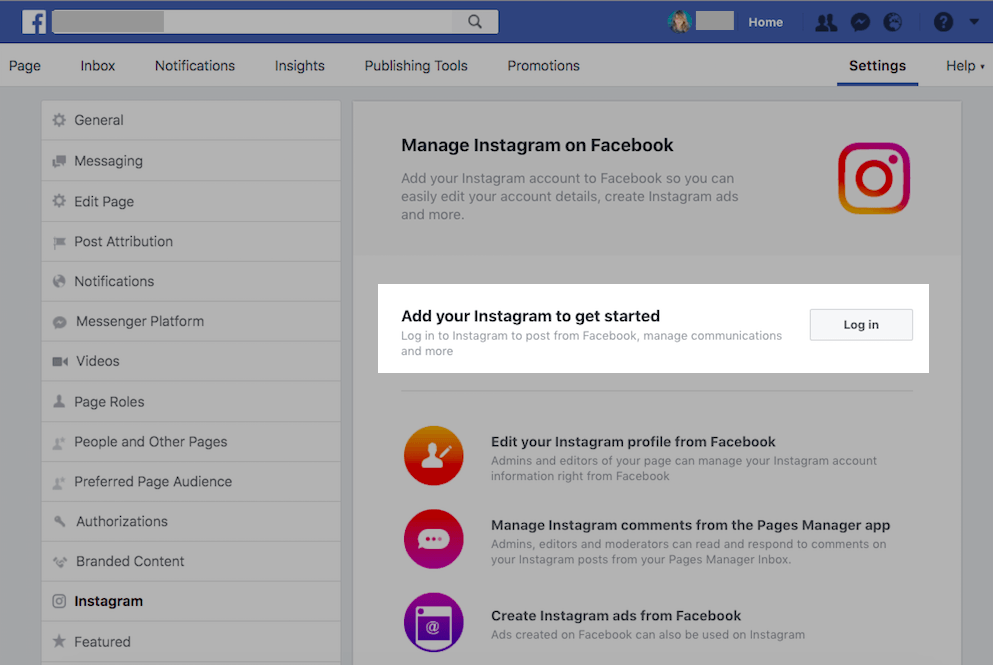
- you see your Instagram account details on your Facebook page, in the Settings, Instagram section;
- your Instagram profile is a business profile. Your Business Type will be listed directly under the name of your account and Email, Directions, or Call buttons on your Instagram profile page.
After confirming your Instagram account is properly connected to your Facebook page, wait for Instagram to approve you account for the Shopping feature.
As soon as your account is approved, you will receive a notification from Instagram that you can turn on the product tagging feature in your Instagram app.
Enable Product Tagging for Instagram
Once your account is approved, to enable the feature in Instagram:
- Go to your Instagram Profile.
- Tap the Get Started alert at the top of your profile.
- If you do not see the alert, go to Settings.
- Tap Shopping, and then tap Continue.
- Select a product catalog to connect to your business profile and tap Done.
Note
If you do not see Shopping under Business Settings in Instagram, your account is likely still under review. If your account has not been approved for the product tagging feature, ensure you have fulfilled all requirements for getting access to the feature.
Tag Products in Instagram
Once you have enabled the Shopping feature on Instagram, you may tag products in your Instagram posts. You can tag up to 5 products per single-image post or 20 products per carousel. You can tag products in posts through your Instagram history.
If your products have variations like sizes or colors, Instagram counts each product variant (for example, size or color options) as a separate item. This may cause the total number of products in your Instagram catalog to exceed the number of products in your Facebook Shop.
When you select a photo for the post, add filters and a caption:
- Tap the products in the photo you want to tag.
- Enter the names of the products you want to tag.
- Select the products as they appear in the search box.
- Tap Done to share your post.
Instagram will review your product tags to ensure they comply with Instagram's commerce policies. The review process usually takes a few seconds, but occasionally Instagram takes more time to check the product in detail.
Tags under review are marked as Pending. These tags will be visible as soon as they are approved by Instagram.
If you delete a product from your catalog or the product runs out of stock, the associated tag will be removed from all posts where it was featured.
Note
The product tag will not reappear when the product comes back in stock.
Related Articles


