Support Articles
Stay Connected
How to Add Schema Markup to Your Site

Schema markup is a code that assists search engines to understand your content and better represent it in the search results.
You’ve probably already encountered marked-up content in the form of rich snippets:

Types of Schema Markup
- Local Business Schema - This tells Search Engines facts about the business, such as hours they’re open, address, phone numbers and more.
- Organisational Schema - This highlights your company’s contact information, logo and social media links enhancing the visibility of this information on the SERP.
- Product Schema - Very helpful for e-commerce sites. This schema is a perfect way to enrich the information a consumer receives when scrolling through their search results.
- Article Schema - This type of schema can be used on news or blog pages and has the potential to increase your appearance in search engine results.
- FAQ Schema - A list of questions and answers about the website or content on the page.
Custom Schema Markup Implementation
Other Tools to Generate Schema Markup
- Google’s Structured Markup Helper
This tool allows you to select the type of schema you want to create and then helps you visually choose the data from the webpage you want to grab it from. This is perfect if the website is already published and you want to simply choose the data on the website. That being said, it is a bit incompetent to use. - Merkle’s Technical SEO Schema Generator
This tool is one of the best tools to use. You can quickly choose the type of schema you want to use and generate . Then, it’s just simple to use the text fields to fill in that data. - Rank Ranger’s Schema Generator.
This is another easy tool to generate schema quickly by providing a scope of text input boxes.
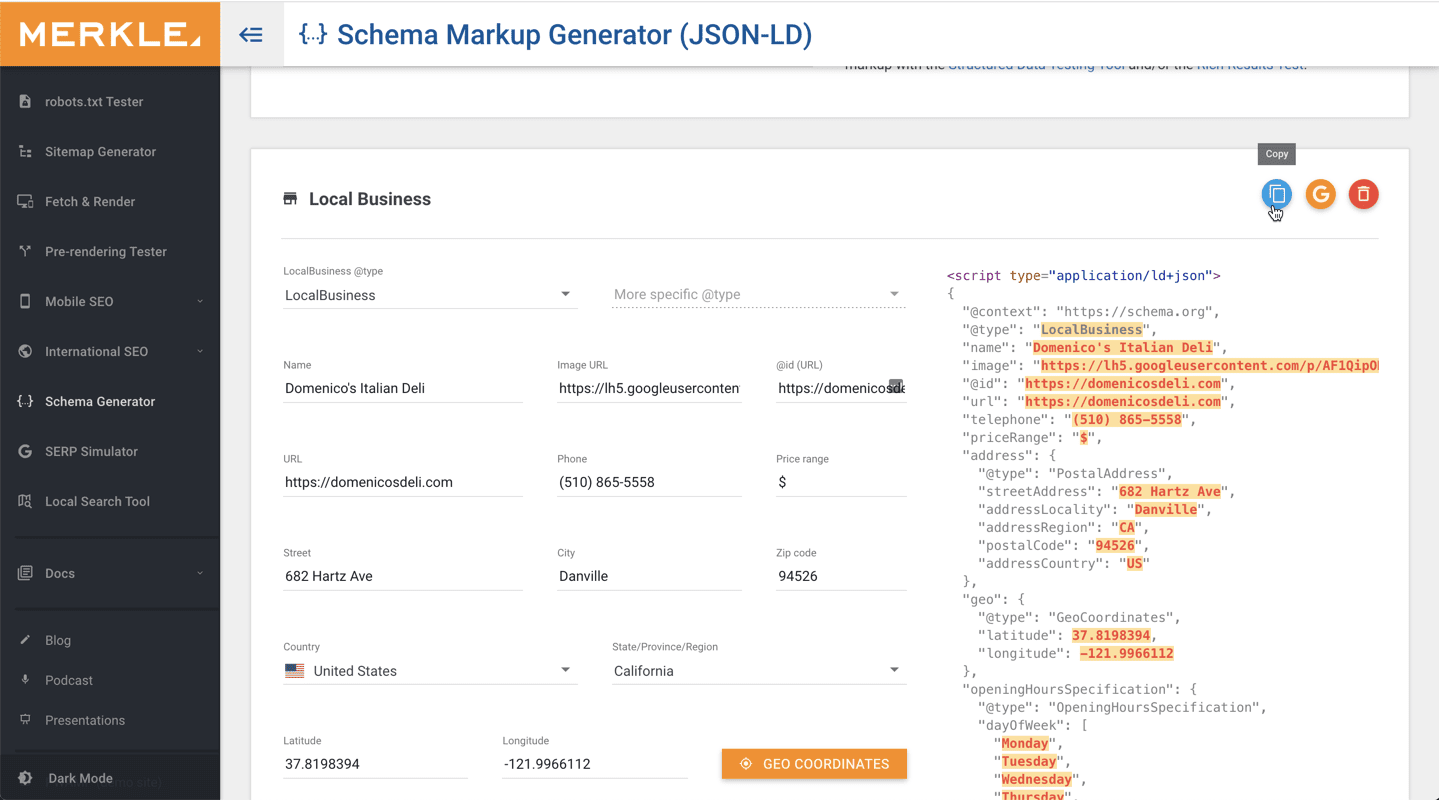
- Visit the Merkle’s Schema Generator.
- Choose the type of schema markup you want to generate from the drop-down. For example, Local Business Schema.
- Complete all fields listed. Then from the right corner, click the Copy button.
Embed Schema Markup on a Page
In order to embed the schema markup on a webpage, please follow these steps:
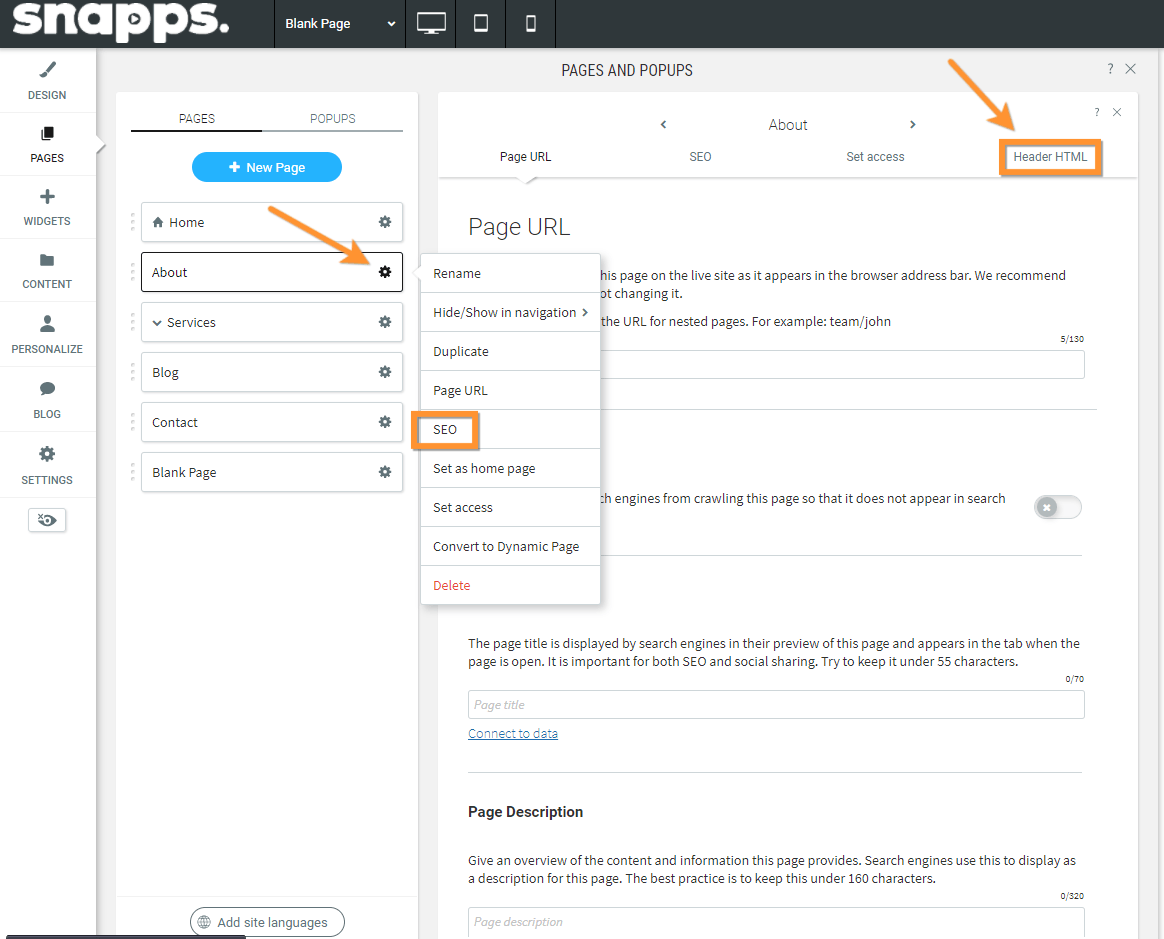
- Go to site editor, and click Pages from the left panel.
- Next to the page that you want to add or enable the schema markup, click the Settings button, then, choose SEO.
- Click or scroll to Header HTML, then, paste the schema markup in the box provided by Snapps.
- Republish the site to ensure the updated schema is live.
Note:
It is important that the schema markup must only be added to the webpages where the content that you used to produce the schema is represented. Remember, adding schema to every page of the site can confuse search engines as to what the schema is actually representing.
Tip:
There are many ways to represent schema such as RDFa, Microdata, and LD+JSON. Snapps recommend focusing on LD+JSON because it is the easiest to read and update, as well as as the most modern solution.
Validate or test the Schema Markup
Once you’ve added the schema and republished the site, you should test or validate your schema markup. To do that, please go to Google’s Structured Data testing tool, type the exact page URL, and then click Run Test.
The test returns the exact schema that Google sees when it crawls your page.

Related Articles